The Air Swimmer Clownfish Instructions are very easy to follow and can make it easier for you to get your clownfish up and running around your house. This has become one of the most popular toys on the market today and there are easy to follow instructions that will allow you to follow the assembly in a matter of minutes so that you can start playing with the clownfish.
Where to Find Air Swimmer Clownfish Instructions
There are a few ways to get Air Swimmer Clownfish instructions, including going onto the company website to view a video instruction process, which includes the different steps so that you can understand exactly how to assemble the fish so that you can make the most out of the toy.
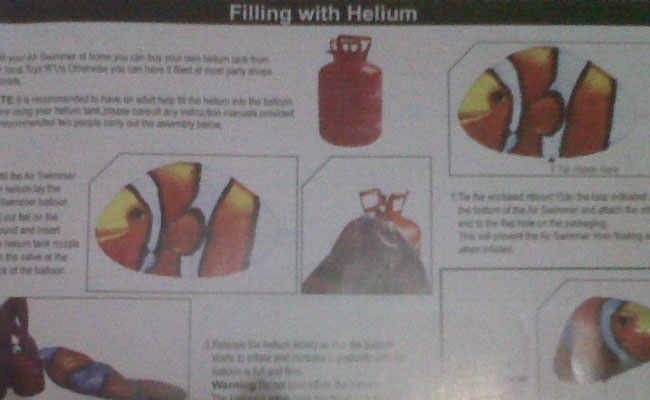
The first step with the Air Swimmer Clownfish Instructions is to fill the clownfish with helium. Whether you have a tank of your own or not, it is imperative that it’s filled with helium and that the air is distributed evenly. If the balloon is overinflated, it will be difficult to control with the remote control, so finding the right balance is important. There is then a ribbon to close the valve.
Air Swimmer Clownfish Instructions

When you are reading through the Air Swimmer Clownfish Instructions, it may be easier to have two people to properly assemble the clownfish. You will need to put batteries into the battery pack inside of the pod track. You then need to attack the pod track to the underside of the balloon.
As you mount the pod track, there are double sticky pads to make this easier. If the other person holds the balloon while you place them on there, it will make it more effective to get the pads placed without the balloon floating away or popping under pressure.
Once the tracks are in place, you will put clear tape tables on the front and pack to help secure it. Then you’re ready to loop the electric wire from the track into the cable hoops, which is all underneath the balloon. After that, the hooks are ready to go on that face towards the head of your Air Swimmer. When that is in place, you’re ready for the tail.
The tail of the Air Swimmer is attached by putting the gin into the motor unit by feeding the rods into the motor unit’s arms. From there you will use four fastening clips at the top and bottom of the assembly arms and then plug the electric wire into the unit.
It’s then about attaching the fins at the top and bottoms of the clownfish so that it looks more like a fish and less like a balloon. As soon as your fish looks like a fish, hook up the remote control and you’re ready to take your Clownfish for a swim.
You have successfully completed the Air Swimmer Clownfish Instructions!