The William Mark Corporation has had their products featured in almost every large retail stores for kids, seeing how successful it was, this particular fan decided to create his own product the “Nano Air Swimmer”.
The reason why the Nano Air Swimmer was built (in his own words) is simply because the retail shark and clownfish are too large of a size which makes it somewhat uncomfortable to maneuver in smaller rooms. Seeing how Plantraco is creating a new class of nano blimps, he decided to take on the task and build an Air Swimmer in the Nano blimp class (with a 9” latex balloon).
Building the Air Swimmer Nano was simple and everything was done with just one servo. The servo allows you to move forward, backwards, and enables steering just like the commercial versions.
Here’s what it looks like in action:
Nano Air Swimmer: Step 1

Plantraco does not explicitly comment just how small and light their Nanoblimp is. From the “helium + balloon sets” they sell with it, I gather it uses 9″ balloons and has a gondola around 6g or less. 6g is the “guaranteed” lift capacity of a fresh 9″ latex balloon. So my goal was to keep everything attached to the balloon under 6g.
-An ultra micro receiver under 1g. I used my favourite 0.65g DelTang Rx33 DSM2 receiver. (With a slightly larger 11″ balloon you can use the cheaper 2.2g OrangeRx R415).
-An ultra micro servo under 2g (a regular type, not a linear one). I used a so called 1.7 g servo, which actually weighs 1.9g with wires and connector. Make sure the connector is compatible with your receiver.
-A 1s LiPo battery around 2g. I used a Zippy 50mAh cell. With a fresh 9″ balloon (carrying 8 g) or an 11″ balloon I was also able to use a more common 2.5g 80mAh one. Obviously you will need a suitable charger (not shown).
-A 25cm battery extension lead to connect your battery to the receiver. A shorter lead works to, but it allows for less trimming the weight distribution.
For the tail:
-Some EPP sheet (Expanded PolyPropylene), 3 mm thick. I used one with two 16 cm long rectangular sides
-About 5cm of 0.8 to 1mm diameter carbon rod.
For assembly and trimming:
-Some sewing thread.
-Superglue.
-Tape (scotch tape or selotape).
-A couple of grams of putty, to be used as trim ballast.
All this is added to a 9″ latex balloon, inflated with helium (and treated with Hi-Float)
Tools:
-A scale accurate to 0.1g
-Felt tip marker pen
-Scissors

You can get all of this at Amazon.
Nano Air Swimmer: Step 2

The carbon rod is attached to the servo horn with some sewing thread. After tying down, the thread is soaked in super glue for a stiff attachment. Excess thread and horn ends are cut, to allow for free movement. of the horn later on.
The carbon rod is attached to the tail fin with some tape. Align carefully so the fin will be perpendicular to the servo and fix with some superglue where the rod protrudes from the tape.
Experimenting with shaping the tail fin showed it not to be very critical for good propulsion.
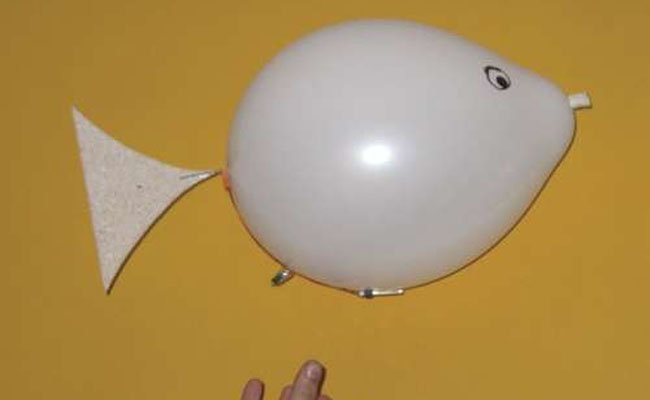
Nano Air Swimmer: Step 3

As the tail represents a large part of the weight it is attached to the convex top side of the balloon (having the largest buoyancy).
Mark the middle of the top of the balloon. Tape the servo in place with its axle at the mark.
The servo and battery extension lead are inserted in the receiver and some tape is added to relieve any tension on the wires where they go into the connectors. The ultra micro connectors do not provide much of tension relief, making them rather fragile.
You can choose to put the servo on either the rudder or the aileron channel. Switch on transmitter and receiver to check. With the servo in neutral position, put the tail fin on the servo in the middle position. It proved not to be necessary to use the screw to keep the horn on the servo.
With the servo in a straight up position determine the underside of the air swimmer and tape the battery near the lowest position. Let the servo leads – receiver – battery extenson leads string run along the balloon towards the battery. No switch is used, connecting the battery switches on. The battery lead end is taped to the balloon near the battery, to keep things in place when switched off.
Nano Air Swimmer: Step 4

Add putty to trim the buoyancy. The air swimmer should almost float neutrally, just sinking very slowly. I put the putty on the balloon’s knot. Then I move and tape the battery more forwards or backwards till the nose is pointing up just slightly.
The air swimmer should slowly rise when moving forwards with some speed. If not, retrim. In any case a regular retrim will be needed as latex balloons lose helium noticeably in a matter of hours.
Flying is easy, real control takes just a little practice. The nano air swimmer is very suitable for kids and for anyone with a lively inner child. Moving forward is simply done by moving the transmitter’s stick left and right with some vigour. Turning is done by restricting the movement to one side or by keeping the tail to the left or right when coasting.
Obviously the air swimmer is only suitable for indoor use. In large rooms air currents and mainly rising air might prove troublesome, but actually the helium loss of a latex balloon is an advantage whenever it is gets stuck to ceiling.
As long as you so keep doors and windows closed and there are no hot surfaces that can damage the balloon nothing much can happen. Even when the balloon does breach the ultra light gear should survive the drop and you can simply replace the balloon and go fly again.
Flight times were easily over 20 minutes with a 80 mAh battery.
See more pictures and videos of the Nano Air Swimmer here.